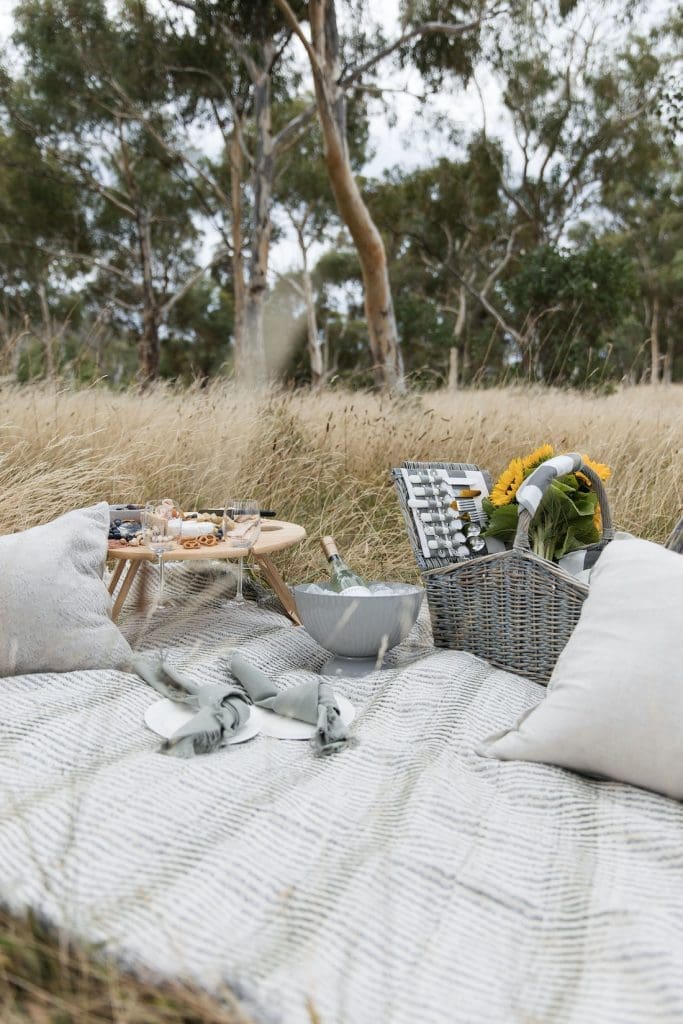
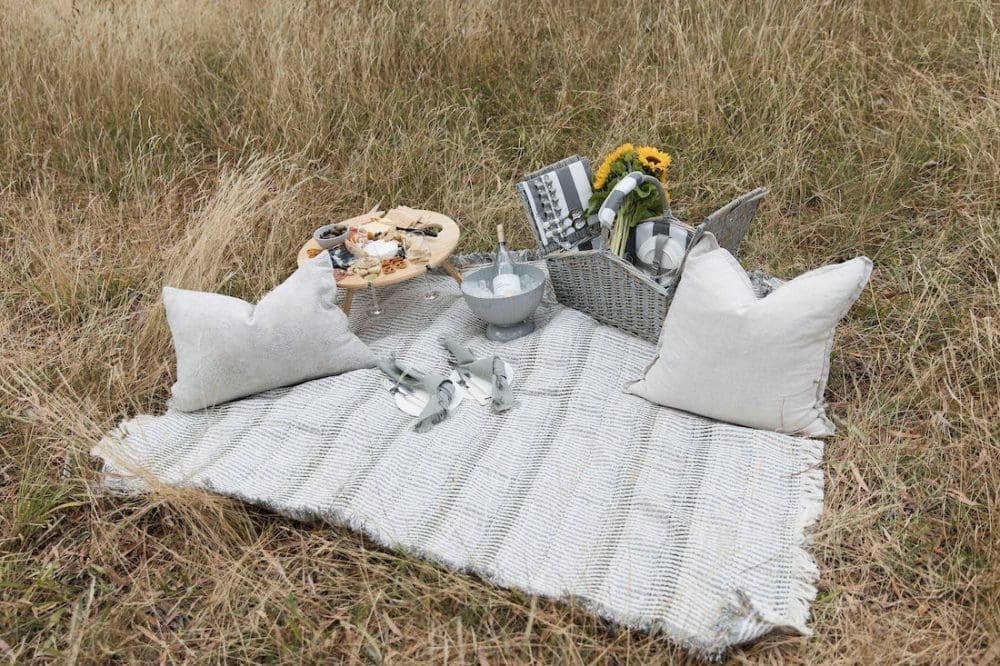
You may have seen on Instagram that I recently posted a reel of a picnic I set up. The rug in that video is actually a regular indoor throw blanket that I hacked into a picnic blanket. Crazy, right?! For under $20, I’m going to show you how you can transform any rug or blanket in your home into a waterproof picnic rug in minutes. This is an easy hack that even a novice DIYer can do so keep on scrolling for all the steps!
Related item: How to pack the perfect picnic: Create a luxe picnic (bonus free checklist!)
Related item: Spring garden party meets wilderness table setting
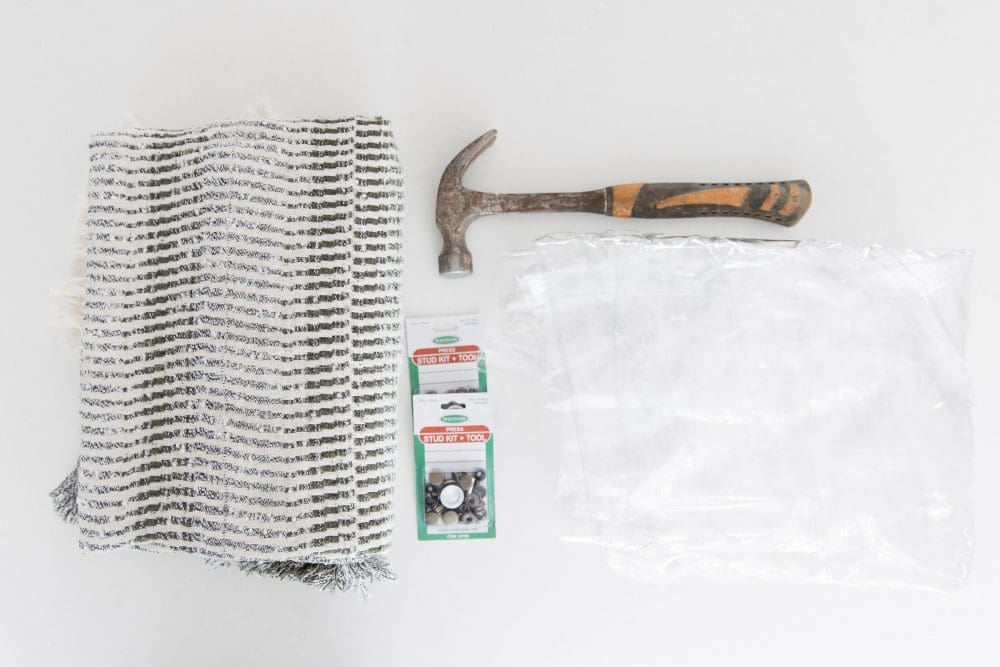
Items you will need:
- a throw rug of your choice
- sheet of PVC at the length of your rug (this is sold by the metre from Lincraft, costing approximately $7 per metre)
- press stud kit (also available at Lincraft. I opted for a bronze finish)
- hammer
- scissors
Steps:
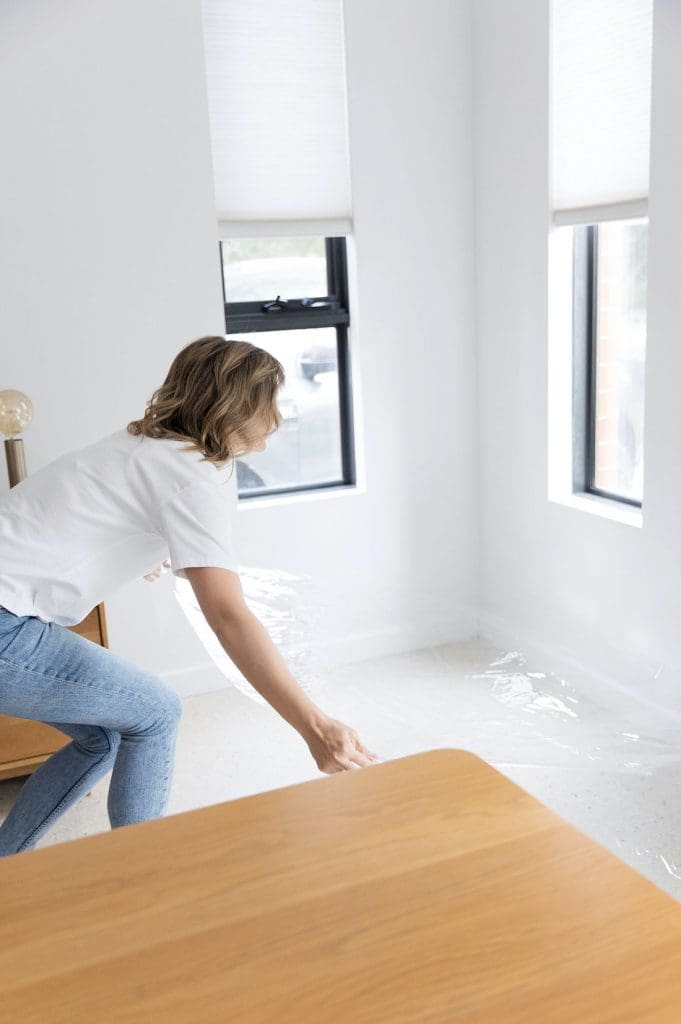
Step 1: Lay out your plastic and cut to size
Firstly, you’ll create the plastic backing for your throw blanket. This is what will make it waterproof.
The easiest way to cut the plastic sheet to size is to find a large, clean floor area where you can lay out your plastic material. This product is sold by the metre at Lincraft and is available in a thick or thin version. I bought 2 metres of the thin plastic as it is still durable while also being easy to fold/roll (and you’ll see why this is important soon).
Next, place your throw blanket on top. Line up the corners on one end and cut a straight line where the throw blanket ends to remove excess plastic. To save time on measuring, I simply placed the throw blanket on top and folded the plastic at this point to create a guide of where to cut — it doesn’t have to be perfect but if you want perfect, you could also grab a measuring tape and texta 😉

Shop picnic essentials


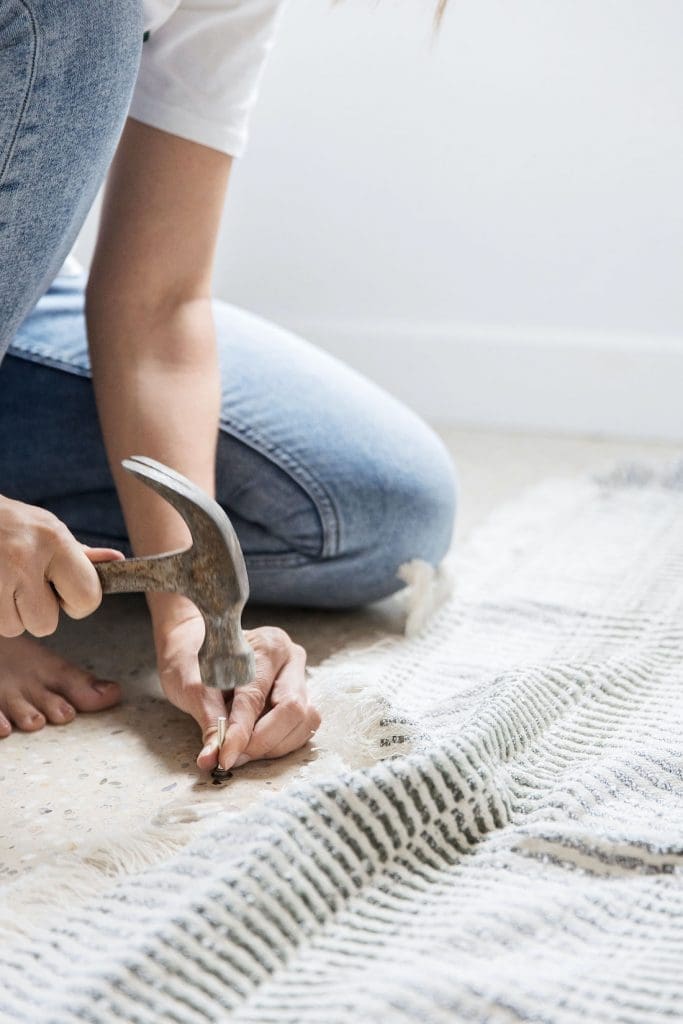
Step 2: Hammer press studs in all corners of the throw and plastic
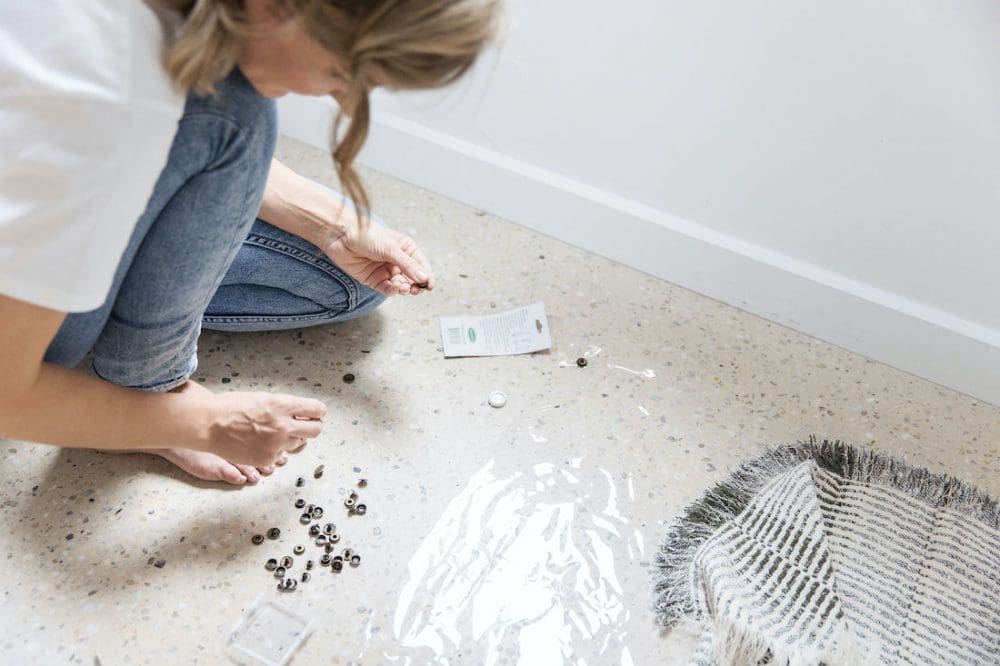
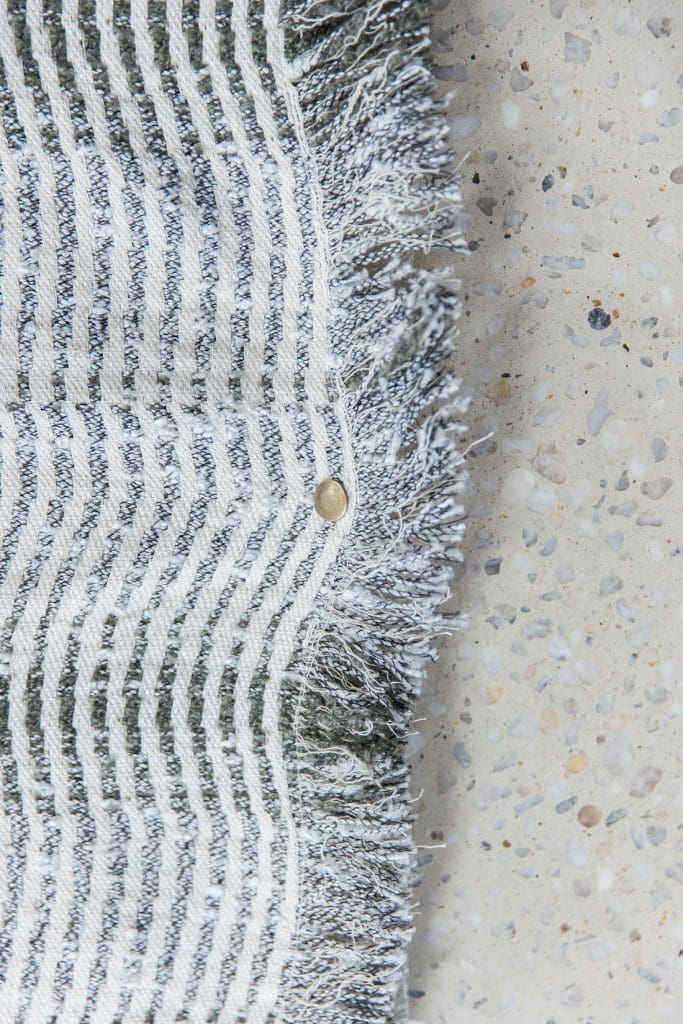
The next step is to add press studs. These are stud pop buttons like those often found in clothing. I opted for bronze press studs as I liked the muted metallic finish.
By fastening the plastic to your throw using press studs, you’ll be able to easily remove the throw blanket from the plastic when you need to pop the blanket in the wash.
Read the instructions on the kit and layout all the parts to make life easier for yourself.
Then use your hammer to add press studs to all 4 corners of your throw blanket and plastic backing.
Each corner of your picnic blanket will use 4 pieces. You’ll attach 2 pieces to the top layer (the throw blanket) and 2 pieces to the bottom layer (the plastic backing). I used the prettier bronze buttons for the top layer (parts A and B) and the inner part of the stud (parts C and D) on the plastic backing. This step will make more sense when it comes time to adding press studs, just follow the packet instructions.
Depending on the size of your blanket, you may also like to add extra press studs along the length. I did this on the two longer sides.
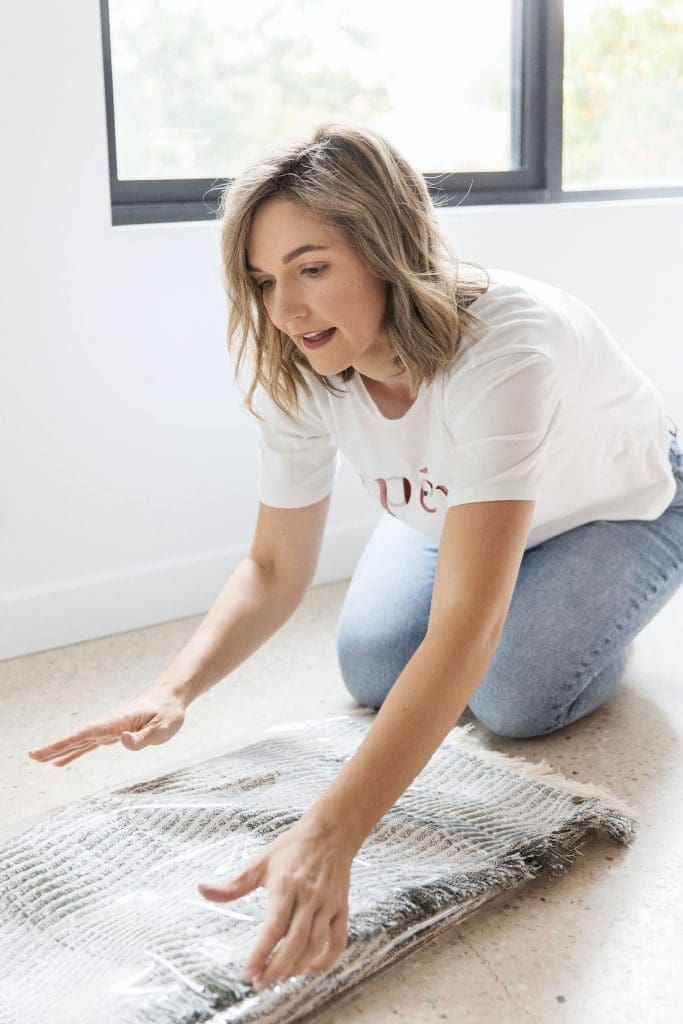
Step 3: Clip it together and roll it up
Your waterproof picnic rug is done! All you need to do is clip the plastic backing to the throw and roll it up. Now it’s ready to take on your next picnic!
This hack to make a waterproof picnic rug was inspired by wanting a soft and comfortable picnic rug that’s large enough for the family to sit on. And that didn’t cost the world. Or look hideous.
You could use the technique in this tutorial to turn any throw blanket you have at home into a waterproof picnic rug for about $20. The plastic backing is $7 per metre and press studs cost about $9 per packet.
Has this DIY inspired you to make a waterproof picnic rug of your own? If you have any questions, pop them in the comments below and I’ll get back to you asap.
More DIY ideas
Shop picnic essentials

Photography by Thorson Photography
Disclaimer: This post was first published in February 2021. It also contains some affiliate links. This means that when you click on a link and purchase something from that site, we may make a small commission at no extra cost to you.
The post How to make a waterproof picnic rug in minutes (and without a sewing machine!) appeared first on Style Curator.


